2D TNT model
Pretty simple model, the main point here is to use the 2D mesher to create a simple mesh and put in the cards that make the model function.
Using the LS PrePost 2D mesher to create the TNT part
Open up LS PrePost and then open up the 2D mesher. To do that, on the right tool bar, select
![]() and then select
and then select 
That will bring up the 2d meshing window
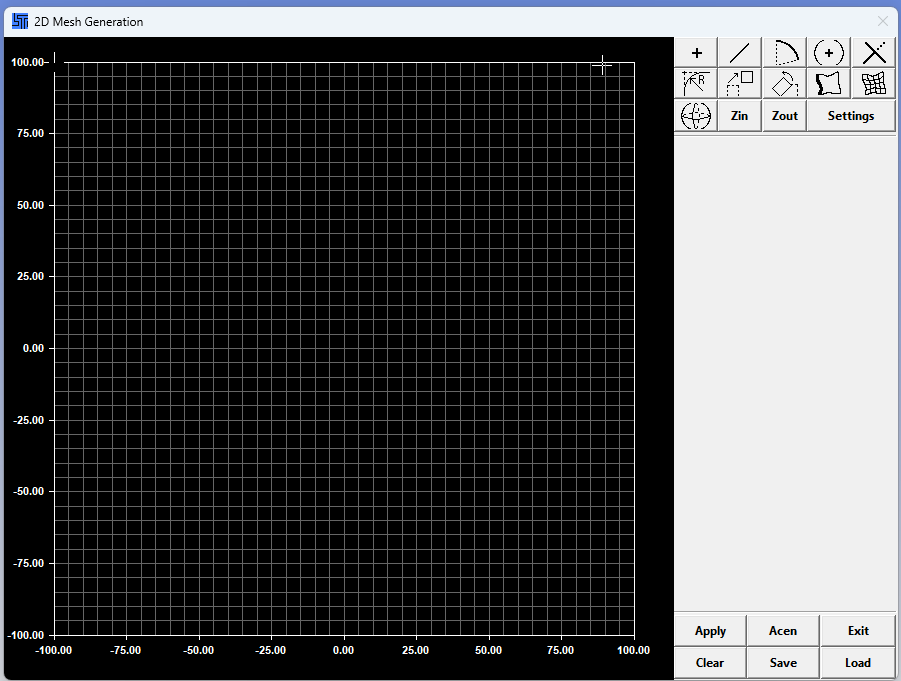
Here’s a video that covers how to create the mesh within the 2D mesher
LS DYNA keywords
Now I need to add in the keywords necessary to make the model act like a detonating piece of TNT.
The keywords that we will be adding are shown to the right.
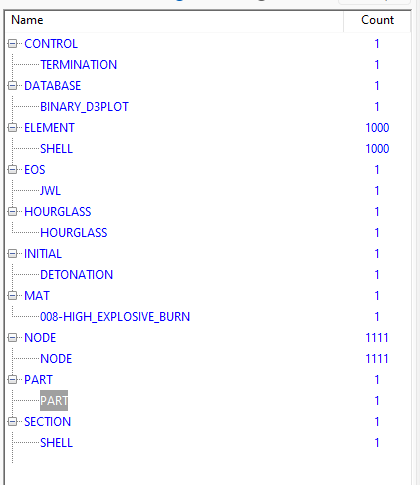
Here’s a video that covers how I added in those parts and the values within each keyword
Keywords
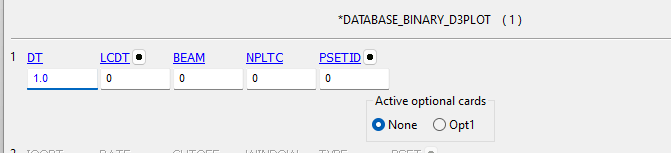
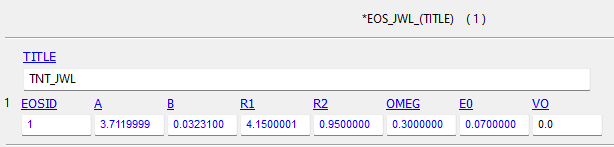
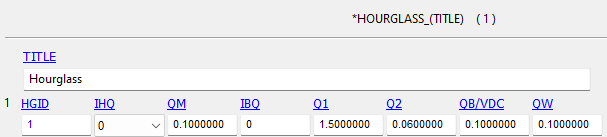
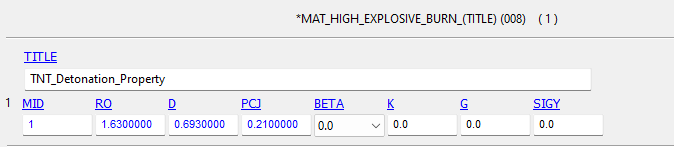
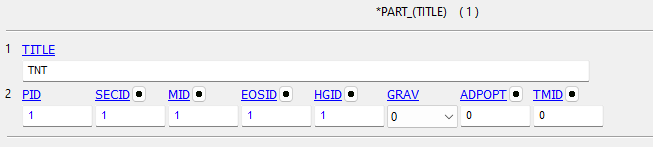
Below are screen shots of the cards I used for the inputs. When you need to find them later, rewatching the video is a bit combersome
Control -> Termination

Database -> Binary_D3Plot
EOS -> JWL
Hourglass
Initial -> Detonation

Mat -> High_Explosive_Burn (008)
Part
Section -> Shell
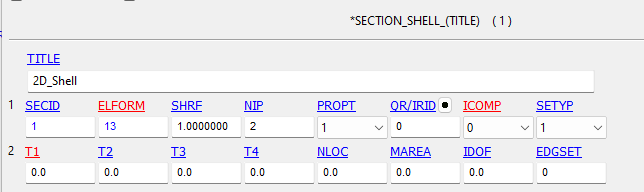
Note that the ELFORM shown above is for 2D cartesian. For axisymmetri, ELFORM = 15.
Running the model and post-run analysis
This video covers how to submit the model to LS Run and then do some limited post-shot analysis.
Changing the model geometry to try something different
A rectangle of TNT is a little boring. Lets say you want to try something that looks really different. Here I’m going to modify the geometry, hook it back up to the various physics models we have and then re-evaluate what happens.