High explosive driven cylinder experiments are one of the most common means of determining an equation of state for an explosive.

In these experiments, shown above, a 1″ diameter x 12″ long cylinder of the explosive of interest is inserted into a cylinder of copper ~ 0.1″ thick. The units have been converted to cm, and the length has been rounded down to 30 cm. Otherwise, this is pretty much the exact setup that is tested.
The explosive is ignited on one end and the detonation causes the wall to expand outward. That is expansion is monitored, usually by some kind of camera or using photon velocimetry probes (PDV).
Building the 2D axisymmetric mesh for the Cylex experiment in LS-Dyna
Here is a video showing how I built a mesh for the geometry shown above using the LS-Dyna 2d mesher
Adding the Keywords needed to make the Cylex model run
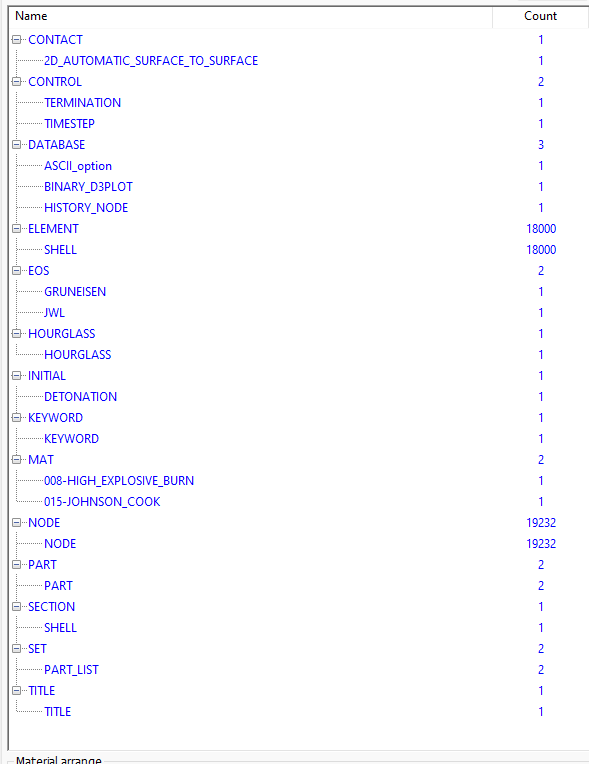
Here is the list of keywords that will be added. Keep in mind that I will be using units of us/g/cm/Mbar for consistency:
Here’s a quick video explaining the various keywords.
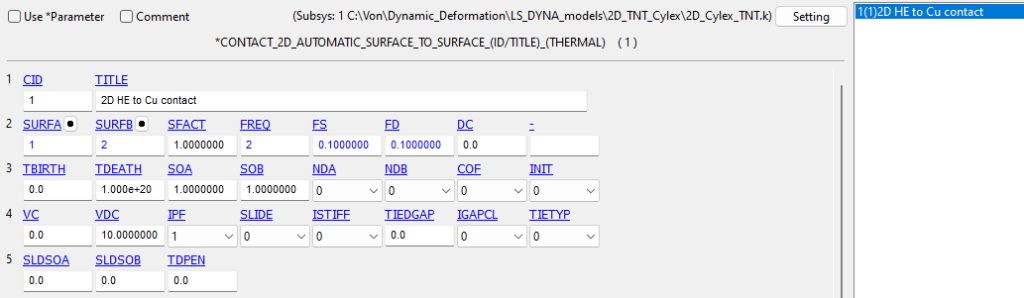
Contact -> 2D_Automatic_Surface_To_Surface
Control -> Termination

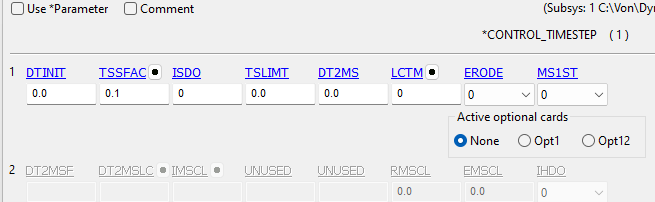
Control -> Timestep
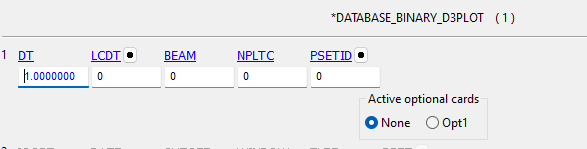
Database -> Binary_D3Plot
Database -> History_Node
Note that the Node ID here was picked to be somewhere around the middle of the outside of the cylinder wall. Depending on the mesh, your node might be a little different. Use Element_Tools -> Identify to help find a node that’s roughly equivalent to mine.

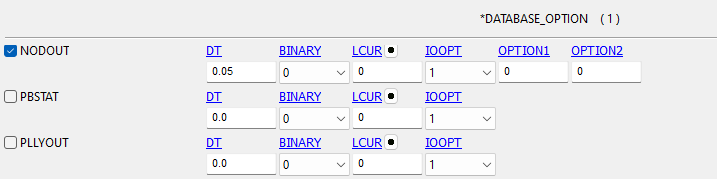
Database -> ASCII_option
I have to turn on NODOUT so that the variables for node 17481 (above) are saved for later post-model analysis.

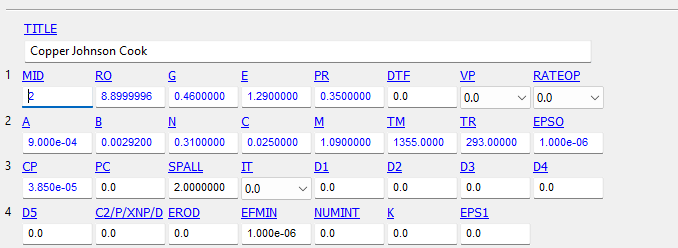
EOS -> Gruneisen
EOS for copper

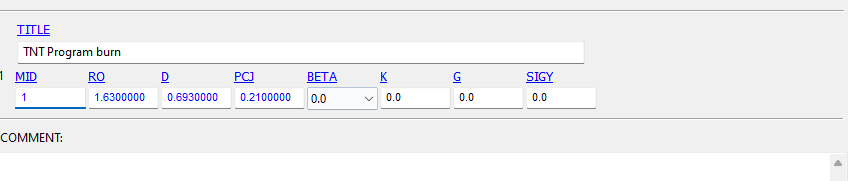
EOS -> JWL
JWL for TNT

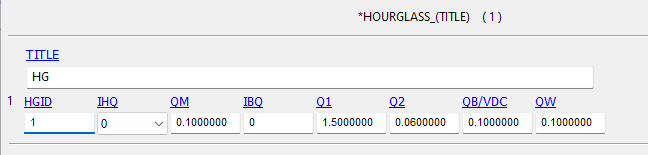
Hourglass
Initial -> Detonation
Light point for the explosive is set just inside the x=0, y=0 point.

Mat -> High Explosive burn (008)
Mat -> Johnson Cook (015)
Part for TNT

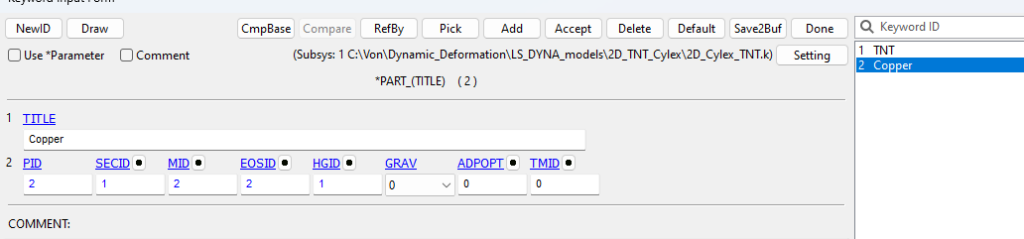
Part for Copper
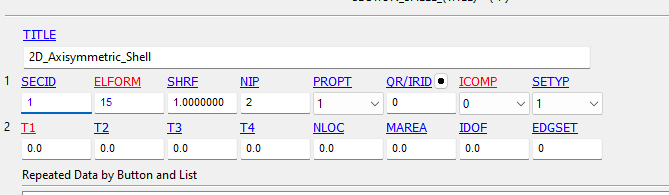
Section
Just make sure to get ELFORM = 15 to make it a 2D axisymmetric model
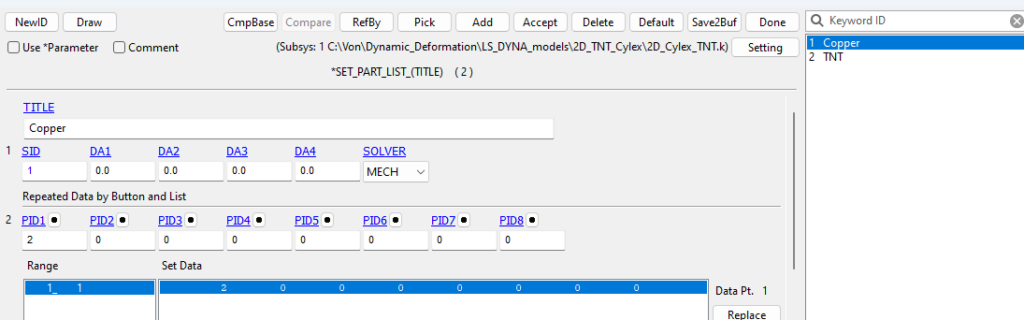
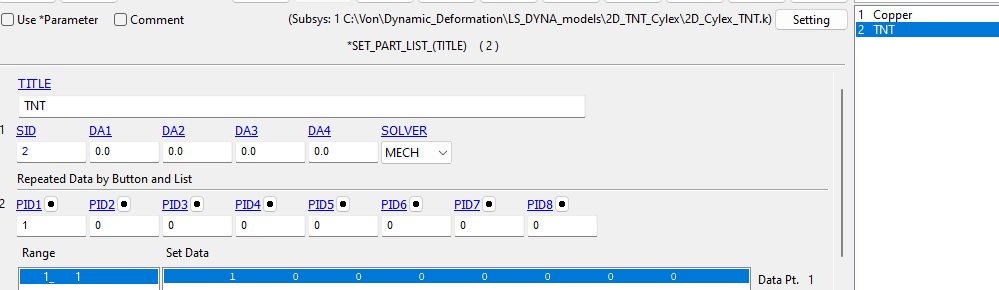
Set -> Part_List
This part list is automatically created when the automatic contact is created, but here are the values that it contains. If everything works, then creating this shouldn’t be needed.
Running the model
This video covers running the model, looking at some of the results and a bit of a discussion on mesh and contact issues